

Thank you for reading this post, don't forget to the best blogger Guy About Home who offers the best garden and home improvement tips! If you are a home decor and design fan, don't miss the tips on home ideas. If you are a home garden owner, then you might be interest in our complete guides to house plants!
The air mattress has become a staple in almost every household. It is a beautiful device to have when guests come over and the regular beds are not sufficient to accommodate the number of guests that you have.

An air mattress can also serve as a primary cushion for one of the spare bedrooms, but you will need to keep an eye out for it, to check if and when it needs more air. Also, knowing how to clean your room would be beneficial, to say the least! Store the air pump close to the bed to quickly top up the air and get it back into shape.
When you’re left with a deflated air mattress you probably just want to throw it out and get a new one. No, you don’t have to throw out your leaky air mattress just yet. If you know the right process, surprisingly it is not that difficult to repair an air mattress. Want more home renovation tips, check how to modernize wall design top for more solution.
If you want to know how to repair an air mattress, the first thing you have to do is, of course, prepare the required tools to do that. Here is a quick checklist for you, gather these supplies and proceed to how to repair an air mattress.
Tools to repair an air mattress
- Patch kit
- Scissors
- Heavy book or weight
- All-purpose cleaner
- Microfiber washcloth
How to repair an air mattress
Step 1 Find the puncture
Source: Pinterest
You would need first fully to inflate the mattress. Then you would need to prop it up by the side of a wall. Make sure the wall does not have too many decorations to avoid any possible accidents.
There are a few ways you can go about inspecting your air mattress for a leak.
It is best to start at the underside of the mattress. This is the area that is commonly punctured by random items left on the floor when setting up an air mattress. So before inspecting any other area of the air matters check its underbelly first. Want more home renovation tips, check how to repair door top for more solution.
Method 1 Listen for the hiss
Source: Pinterest
One way to check for air leaks is just to put your ear close to the surface of the air mattress and listen for the hissing sound of escaping air. Make sure the room you are in is free from any unnecessary noise.
Do this in sections and work in a grid-like pattern, try your best to listen for the sound of air escaping. Once you locate the hole then you would need to mark it, use a marker to highlight where the hole is. It is essential to mark the hole at this point because it will be challenging to find the hole again later.
Method 2 Lip service
Another way to try and find the source of the air leak is by licking your lips and putting your mouth close to the surface to work and feel the air escaping. Do this method along the entire surface of the air bed.
Start with the back then the front, if you still cannot locate the puncture then try the sides as well. Once you discover the hole, don’t forget to mark it with a permanent marker.
Method 3 Air Bubbly
The last way you can check for holes in your air mattress is by using soapy water. Take an empty spray bottle and pour a tablespoon of dishwashing liquid and fill it up with water, close it up and shake well. This will create a very bubbly solution that you can then spray directly on the air mattress itself.
The purpose of which is to hopefully locate the hole with the help of the soapy water. When the water comes into contact with the air leak, you will visibly see the water bubble from the escaping air. Once you observe the bubbles, dry the surface of the airbed where the hole is located and mark the hole with a permanent marker.
Step 2 Prep the spot
First, you would need to completely deflate the air mattress to properly proceed with the repair.
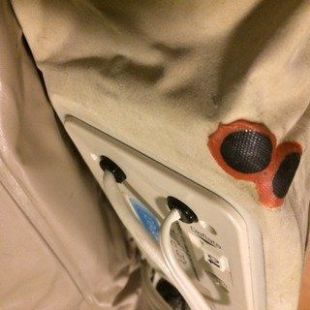
At this stage, you would need to have your patch kit ready. If the hole is located on the underside of the mattress, then you can proceed with the patching the leak up. In case the hole is located on the sleeping surface where the soft flocking is located you will need to remove the flocking.
Flocking is the term used for the soft felt-like surface of most air beds. You would need to prepare the area to be patched. You can either use a steel brush or sandpaper to carefully scrape the flocking from the surface of the air bed.
This is essential because the patch kit will not properly stick to the surface if it is covered in flocking. Be careful when scraping the flocking off, stop as soon as you see the vinyl. Do not overdo the sanding or scraping or else you would be creating a bigger hole to deal with.
Step 3 Spot clean
Before you apply the patch, you would need first to clean the surface. Take your all-purpose cleaner and spray it around the area of the hole. Clean the area with a microfiber washcloth. Do not use paper towels as to not leave any paper fibres around the hole; it could cause your patchwork to fail. Want more home renovation tips, check what to do with a long wall top for more solution.
Step 4 Patch job

Now that the immediate area of the hole is ready to receive the patch, go ahead and open your patch kit. There should be instructions with it, read them carefully. When you cut out the patch, you want it big enough to cover the hole entirely and then some.
From the centre of the hole, make sure to give at least a one-inch allowance on each side for the correct size of the patch. Generously apply the glue or liquid cement directly onto the patch. Cover the hole with the patch and push down.
If you want to know how to repair a hole in an air mattress, then this is the only way to do that.
If you have a heavy book or a ten-pound weight, put that on top of the patch and leave it there for about six to eight hours. This step is vital to ensure the patch is permanently bonded to the hole to allow for a durable, long lasting repair. Want more home cleaning tips, check how to clean the backyard seating ideas top for more solution.
Conclusion:
The convenience of owning an air mattress certainly outweighs the trouble of maintaining one. Once you know how to repair an air mattress, you would want to have one stored away in case you need it. Air beds are suitable for everyday use as well; you no longer have to worry about a possible puncture because you can quickly fix them anyway.
For more amazing ideas you can have, visit Guy About Home today or you can check the related blogs: