
Thank you for reading this post, don't forget to the best blogger Guy About Home who offers the best garden and home improvement tips! If you are a home decor and design fan, don't miss the tips on home ideas. If you are a home garden owner, then you might be interest in our complete guides to house plants!
Leather, made from animal rawhides are essential source materials for our tools, clothing, shoes and various items in our homes spanning back to the dawn of civilisation. Leather has been used on our clothes and armour to keep us warm and protect us from the elements.

Tanning of hides during the Neolithic era streamlined the way to preserve leather for use throughout the world. Leather’s history is intertwined with that of the human race’s evolution.
Throughout the millennia, we have perfected the art of manufacturing leather goods for all sorts of uses. From expensive Italian leather shoes, leather clothes, leather hats, leather accessories, leather bags and yes even leather couches.
There is something undeniably cool about owning articles of leather clothing, and yes, this translates to the awesomeness of owning a leather couch. Genuine leather goods do not come cheap, so it is quite frustrating when our beloved house pets scratch or claw at our leather sofa.
In that first moment we see scratches on our leather furniture, deep dread hits us, and we can’t help but get upset with the lovable and guilty culprits.
Before you call a professional leather cleaning or leather fixing service, try fixing the damage yourself by directly following the steps indicated below.
Tools to repair leather couch
- Scissors or clippers
- Sponges
- Washcloth
- Leather cleaner
- Heavy filler
- Leather binder
- Leader colourant
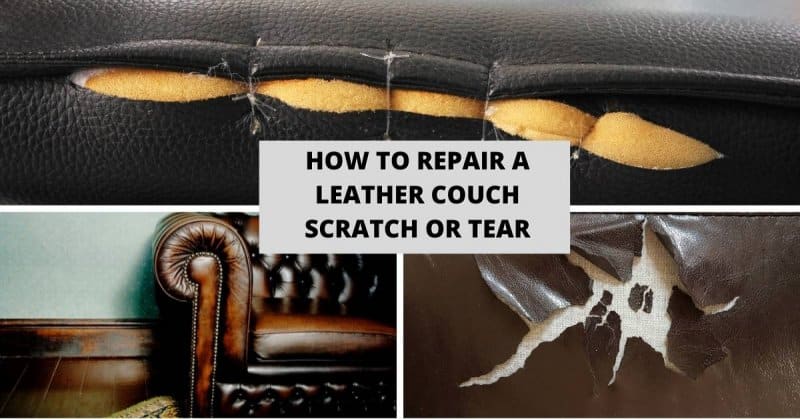
How to repair a leather couch from cat scratches
Minor damage
If your couch has very shallow cat scratches or only has minor damage, then a quick fix could be enough to repair the leather couch, so the damage is no longer noticeable.
Step 1 Clean the damaged area
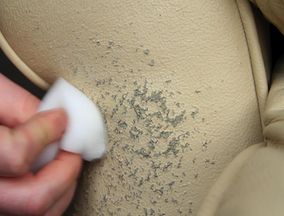
Image Source: Pinterest
Use a leather cleaner to clean the damaged area. Apply the leather cleaner onto a clean sponge and clean the damaged area. Wipe the damaged area clean in a circular motion.
Let the cleaner air dry of you can also use a hair dryer to speed dry the area and proceed to the next step. It is essential not to use a heat gun because that could burn the leather, only use a regular household hairdryer when speed drying.
Step 2 Apply the leather dye
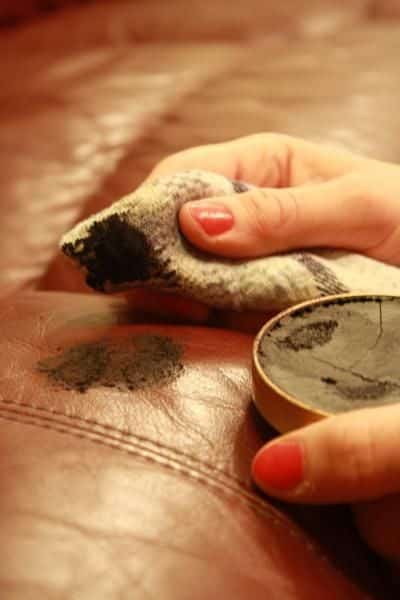
Image Source: Pinterest
Similar process as when cleaning the affected area. Squeeze a small amount of the leather dye onto a clean sponge. Make sure you use a leather dye which is the same colour of your couch.
The leather dye will cover the damaged area with colour, masking any discolouration from the scratches.
Then take the sponge and rub the leather dye into the damaged area, you want the die to soak into the scratches. Make sure to dry the dye well; you can wait to let it air dry or again use a hair dryer to hasten the drying process.
Repeat this process until the damaged area is the same colour as the rest of the couch.
Step 3 Apply the leather sealant
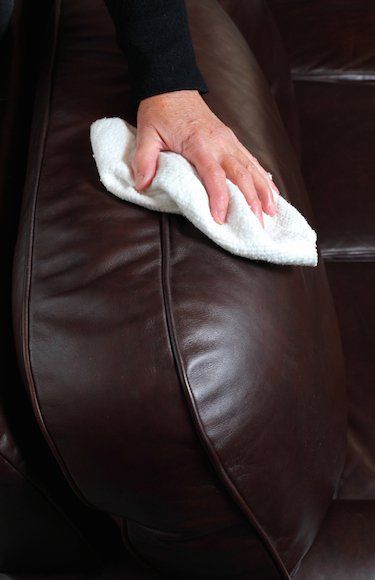
Image Source: Pinterest
The leather sealant is applied in the same way you used the cleaner and the dye. Pour a small amount of the sealant onto a clean sponge, then in a circular motion rub the area you are treating.
This process will not only seal in the repair but also protect the treated area as well. You can leave this to dry or use a hairdryer to speed dry the area.
Major Damage
If the damage to your leather couch has many visible fibres sticking out and it too severe for the steps above to fix then continue with these steps to fix the significant scratch damage.
Step 1 Trim any loose fibres

Image Source: Pinterest
In the aftermath of your pets claw session, the scratches are prominently seen on your leather couch. Usually there are leather fibres hanging loose all over the area where the scratches are present.
Use scissors or hair clippers to cut away all the loose fibres carefully. Be extra careful not to accidentally puncture or cut into the leather couch itself and cause more damage that you would then have to repair as well.
Before proceeding it is vital to clean the area being treated with leather cleaner. Apply to a clean sponge and wipe the area clean in a circular motion.
Step 2 Apply the leather binder

Image Source: Pinterest
Once all the loose fibres have been carefully trimmed, and the area has been adequately cleaned, then it’s time to apply the next product. Grab your leather binder and squeeze a small amount into a clean sponge, then in a circular motion rub the product into the area being treated.
Leave to dry or use a hairdryer to speed dry the treated area. You will need to apply about about eight to ten coats of the leather binder, depending on how severe the damage is. It is essential to dry the treated area properly before applying the next coat.
Applying the leather binder will strengthen the material being repaired and will allow for a long-lasting, durable repair.
Step 3 Sand the area being Treated

Image Source: Pinterest
For this stage, it is essential to sand the area that you have applied the leather binder. Use 800 – 1200 grit sandpaper you want the space being repaired to be as smooth as possible. This process aims to prepare the area for the next step of the repair.
You would need to sand the area being treated several times after each product to make sure the area is smooth to the touch. Do not apply any downward force when sanding, merely move the sandpaper from side to side. Clean the area again with leather cleaner when done with the sanding.
Step 4 Apply the heavy filler

Image Source: Pinterest
Use the spatula that comes with the leather repair kit or use a plastic card and take a small amount and apply it directly onto the damaged area. Make sure to apply the heavy filler in the area being treated evenly.
The filler should be applied thinly for it to dry quicker, use the spatula or plastic card to remove any excess. A thin layer of filler will take about fifteen to twenty minutes to dry, read the instructions to verify requisite wait times.
Slathering too much filler will prolong the drying time, lengthening the repair process. Be sure to allow the filler to dry completely before applying the next coat. The point of this stage is to make the damaged surface the same level as that of the undamaged surface of your couch.
Apply as many coats as needed to achieve this, it is essential to allow each coat to dry before applying the next coat of filler. Once the damaged area is filled, it is time to again sand the area smooth. This process will prepare the are for the next step which is adding the colourant.
Step 5 Apply the leather colourant or Dye
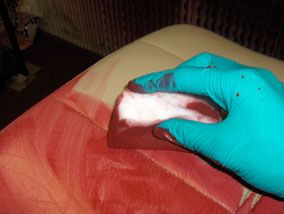
Image Source: Pinterest
Only a small amount of leather dye or leather colourant is required on a clean sponge. Dab or rub the colourant or leather dye in a circular motion throughout the area being treated.
Make sure to rub the cracks and scratches allowing the dye to seep into the entire area being treated. Similar to the other products you would need to enable the dye to dry or speed things along with a hairdryer.
Using the sponge, apply as many coats of the dye as needed, always allowing it to dry after each coat. In case you own an airbrush use that if the area being treated and repaired is a significant size. If you don’t own an airbrush, don’t worry a clean sponge will do nicely.
Step 6 Apply the Leather Sealant
This is the final stage in the repair process. Apply the sealant using a clean sponge or airbrush. The sealant will seal the dye into the surface of the couch, and it also works to protect it against wear n tear. Again this it is essential that you need to let the product dry before applying the next coat of leather sealant.
How to repair a leather couch tear
Step 1 Patch it up

Image Source: Pinterest
For a tear on your leather couch, you will need to insert a piece of patch material into the damage itself. You can buy a leather repair kit that usually comes with the patch material needed to fix a tear in your leather couch. This will create a firm backing material for you to glue the tear to.
Step 2 Super Gluey
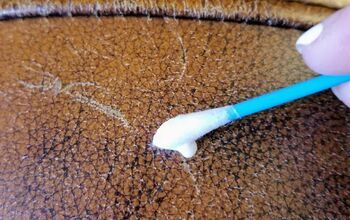
Image Source: Pinterest
Then use the super glue on the face of the tear itself and let it dry. Then use 800 grit sandpaper to sand the surface smooth. Be careful not to apply any downward pressure, simple, quick side to side movements will do.
Step 3 Dye it
Image Source: Pinterest
Use a clean sponge to apply the leather dye, rub in a circular motion. Let it dry. Use a hairdryer to speed dry and re-apply the colour as needed. Apply as many coats as you need to bring the original colour back.
Step 4 Seal it
Image Source: Pinterest
Then apply a leather sealant, using the same method. Pour a small amount into a clean sponge and in a circular motion rub the treated area. Let it air dry or use a hairdryer and apply the sealant once more time for good measure. Watch this great instructional video made by leather repair professionals on how to repair a leather couch tear.
Conclusion:
Whatever kind of damage that may occur to your leather couch, there are corresponding ways to repair and treat the damage to make it like it never even happened. Just bookmark this page and follow the steps above to get scratches and tears sorted out in no time.
You do not have to throw out the leather couch because the cat went nuts, just be patient and carefully follow the steps above on how to repair a leather couch from cat scratches.
If you are dealing with a tear, then follow the steps on how to repair a leather couch tear. Just bookmark this page and follow the steps above to get them sorted out in no time. In case your couch is peeling, check out my article “How to repair a peeling leather sofa“.
For more amazing ideas you can have, visit Guy About Home today or you can check the related blogs:

Thanks so much….just stumbled on this & its such a big relief!…don’t need to do a major overhaul on my sofas
I am not one who comments usually on article. However, this topic as well as your input on it, has made me really feel that I should. I am so amazed with the quantity of research you put into it. Truly one of the best points I’ve discovered on the net just recently. Thank you.