Thank you for reading this post, don't forget to the best blogger Guy About Home who offers the best garden and home improvement tips! If you are a home decor and design fan, don't miss the tips on home ideas. If you are a home garden owner, then you might be interest in our complete guides to house plants!
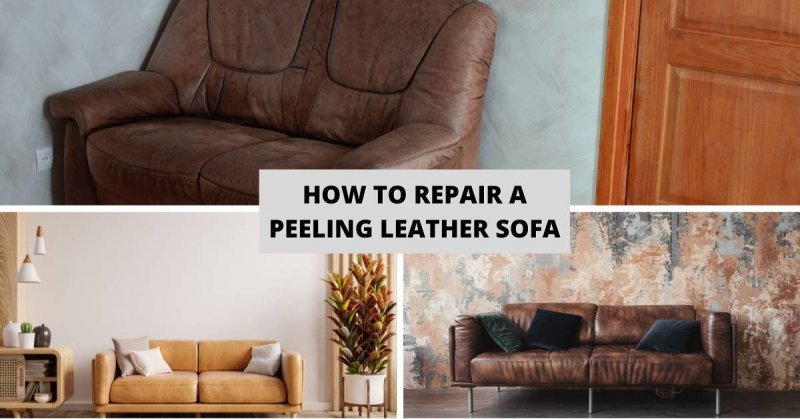
Peeling leather sofas can be a massive eyesore in your living room. It is a common occurrence in faux leather couches, and it happens to genuine leather sofas as well.

Improper maintenance or lack thereof, can cause peeling over time. Peeling also occurs due from regular wear and tear.
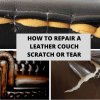
In case the damage to your leather couch is more than just peeling then please read my previous article “How to repair a leather couch scratch or tear”. It is a step by step guide on how to repair minor damages from scratches.
The guide goes into every minute detail to fix significant damage from a cat or other pet scratches. My previous article also talks the ins and outs of repairing full blown tears as well.
Now back to the topic at hand. Thankfully, repairing peeling damage is not as time-consuming as repairing more severe damage like tears or scratches. First, you would need to prepare the tools required to rehabilitate the damaged area.
Tools to fix a peeling leather sofa
- Leather cleaner
- Heavy heavy filler
- Spatula or plastic card
- Clean sponges
- Leather Dye
- Leather sealant
- Hairdryer
Gather all the materials and tools that you need to accomplish this repair. Once you have everything that you need to complete the repair efficiently, then it is time to begin. Make sure and take the time to carefully follow the instructions on each of the steps indicated below.
Step 1 Pre-clean
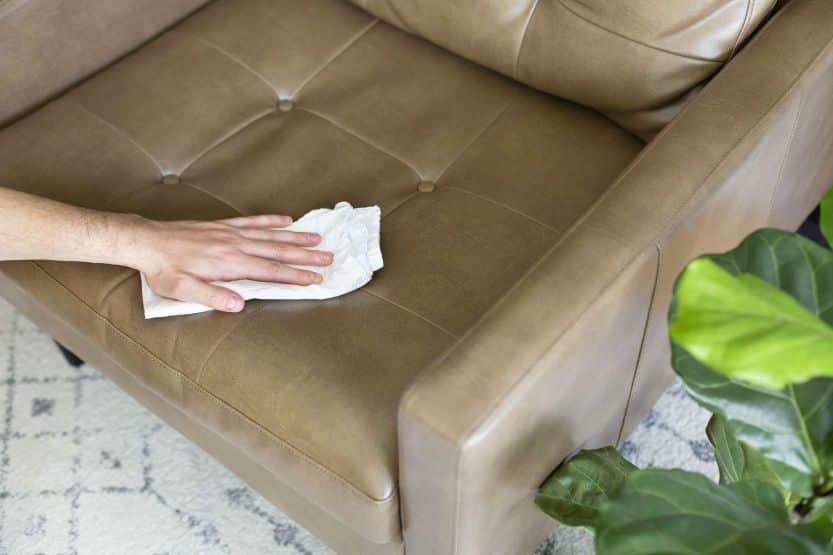
Image Source: Pinterest
Prepare the damaged area by trimming any loose fibres from the couch. Since there is material that is already peeling, use a pair of scissors and carefully cut away the pieces that are practically falling off.
Cutting away those loose fibres will better prepare the area for more durable repair. After doing that, it is essential to pre-clean the area that is being treated. Open up your bottle of leather cleaner and apply a small amount on a clean sponge.
Then rub the area that is being treated in a circular motion. You need to make sure this area is clean before you proceed to the next step.
Step 2 Fill it up
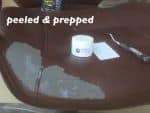
Image Source: Pinterest
The purpose of this step is to fill the areas where the leather has peeled off with heavy filler. When you purchase a leather repair kit, this usually comes with all the materials you would need to accomplish a simple repair yourself.
If you do not want to buy a whole repair kit then just buy the products listed above. The heavy filler regularly comes with a plastic spatula. In case you don’t have one, you can also use a plastic card for the application process.
Merely scoop up a small amount with the spatula and apply it directly to the area where it has completely peeled. Take your time and use it evenly throughout the damaged area. Do not apply too much filler that the damaged area is not the same level as the original leather.
The last thing you want is for there to be a bulge of hard filler where the damage used to be. It is vital that the area being repaired be only the same level as the undamaged area of the couch. This will allow the filler to harden and form a surface that will seem seamless and look uniform with the rest of the sofa.
Leave it to air dry or use a hairdryer to speed dry. Never use a heat gun as it may burn the leather and cause even more damage. This is the best way on how to repair leather sofa peeling.
Step 3 Sand it

Image Source: Pinterest
You will need to sand the area where you applied the filler, for this step use 800 grit sandpaper. The purpose of this is to make the surface where you applied the heavy filler be as smooth as possible. This process will also ensure that the filler will be as smooth as the rest of the original couch.
It is not necessary to use downward for when sanding the filler. The correct way to sand this area is by moving the sandpaper rapidly from side to side, using quick gestures.
Step 4 Apply the leather dye
Image Source: Pinterest
For this, you will need to apply a leather dye that is the same colour as your couch. Most leather repair kits come with colourant that allows you to blend the colours of the dye to the tone you need.
Some leather colourants already come in the colour of your couch but you will need to order or purchase those specifically. The application process for this is the same as the leather cleaner.
All you need to do is pour a small amount onto a clean sponge and dab the area being treated. You want the colourant to seep into the filler, leave to dry or speed dry using a hairdryer.
Apply as many coats of the leather dye as needed. Rub the area around the area that is being treated as well. Doing that will make the surface of the couch more uniform as well.
When you are satisfied that the area being repaired is the same colour as the rest of the couch, then it is time to proceed to the final step. Again, make sure to dry the area after every coat of the dye.
Step 5 Seal it
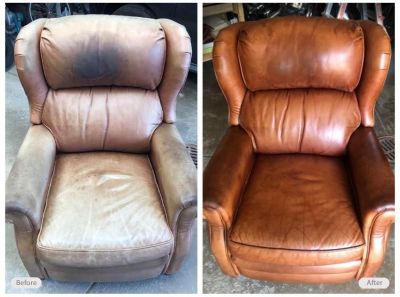
Image Source: Pinterest
The final stage involves you applying leather sealant to the repaired area. By now the repair should be looking complete, all that is left to do is to seal the colourant in and protect the finish of the repaired area.
Applying the leather sealant is a similar process as the leather cleaner and leather dye. The only thing you need is another clean sponge and the leather sealant. Apply a modest amount of leather sealant onto a sponge and in a circular motion rub the repaired area.
It is again essential to let the sealant dry before applying another coat. Leave to dry or use the hairdryer to speed dry so you can apply another coat faster. For best results, it is advised to apply the leather sealant three to four times.
Conclusion:
A peeling couch is unsightly. Don’t wait until it gets worse before you do something about it. Throw away the notion that you need to buy a new couch just because some of the surface areas has peeled off.
The steps above are all you need to reverse the damage and make your couch look like new again. Just bookmark this page and follow the instructions when you get around to fixing your peeling leather sofa.
For more amazing ideas you can have, visit Guy About Home today or you can check the related blogs: