Thank you for reading this post, don't forget to the best blogger Guy About Home who offers the best garden and home improvement tips! If you are a home decor and design fan, don't miss the tips on home ideas. If you are a home garden owner, then you might be interest in our complete guides to house plants!
For the most part, cleaning our bathroom can be a daunting task especially if we don’t know where to start. And that’s the very reason why a bathroom cleaning checklist is very important to have.

Now, making a checklist is not actually that easy. In your checklist, you should know what’s the most priority to the least. By doing this, you’ll surely know how to execute the task.
If ever you don’t have ye any idea on where to start, or what to include in your checklist, then good for you because we’ll be sharing you an in-depth bathroom cleaning checklist that will surely make things hassle-free.
Ready? Then read on!
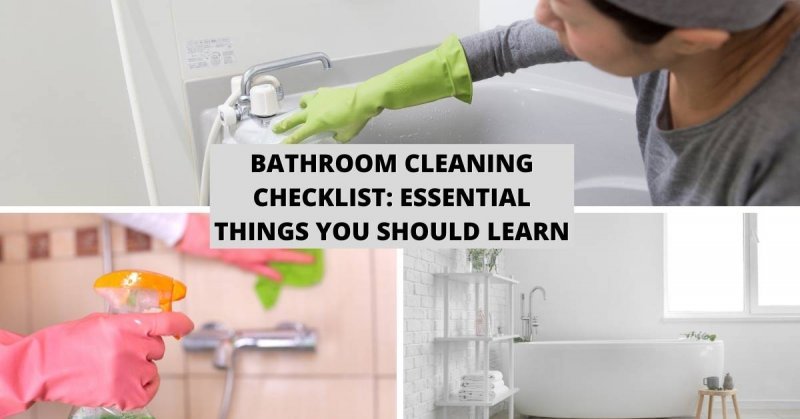
Bathroom Cleaning Checklist: Essential Things You Should Learn

First things first; keep in mind that each of the tasks we’ll be tackling must be done at least once a week. You should do this if you don’t really want to make your cleaning a hassle.
Now, here are the things you should definitely include in your checklist:
- Cleaning the Floors
- Washing and Air-drying the Rugs
- Cleaning the Baseboards
- Unclogging the Air Vents
- Cleaning the Wastebasket
- Cleaning and Disinfecting the Toilet
- Cleaning Out the Drawers
- Polishing the Mirror
- Clean the Shower and the Tub
These 9 things are essential if you really want to make your bathroom cleaning effective and worth of your time and. Let’s elaborate them one by one.
1.) Cleaning the Floors
The first task on your bathroom cleaning is to deal with the floors. Vacuum or sweep at least after a couple of days. You can also use a spray bottle and a rag to spray and wipe down the tiles.
Actually, using a spray and a rag to clean the tiles is the most basic and practical thing you can execute. In addition to that an average bathroom is not that big, so using a vacuum is not really necessary.
2.) Washing and Air-drying the Rugs
It might not be obvious, but rugs tend to accumulate dust and toiletry residues the most because of their fibers. And that’s why we highly suggest washing them with a washing machine.
But before immersing the rugs on the machine, make sure that they’re machine washable, and that’s a good thing because most of them are.
After washing the rugs, place them under the sun to air-dry them and preclude any unpleasant smell out of your lavatory.
3.) Cleaning the Baseboards
Baseboards are often overlooked by homeowners, and that’s why they’re one of the dirtiest places in a bathroom. Make sure to at least take the time to clean your baseboards every month so they don’t accumulate nasty grime.
Here are the steps for cleaning your baseboards:
Get a partner to aid you in moving away any furniture from the walls.
- Dry dust the baseboards with a vacuum cleaner attachment or even a microfiber cloth will do. But if you use cloth, you should also incorporate a yoga mat so you won’t get dirty when you kneel while cleaning.
- Mix 2 quarts of warm water and a few drops of dishwashing liquid in your bucket.
- Immerse the clean cloth in the bucket and wring it to remove unnecessary excess water. Having a saturated microfiber cloth won’t be able to clean anything effectively. In addition, you probably don’t want to ruin your floors by dripping water while cleaning the baseboards.
- Next is to wipe down the baseboards using the dampened cloth. When the water begins to look cloudy, you should change the water solution.
- Clean edges and corners with a cotton swab immersed in you the mixture of dishwashing liquid and water.
- And lastly, put up electric fans to dry your baseboards before returning the removed furniture to their corresponding spots.
4.) Unclogging the Air Vents
Similar to baseboards, air vents are also often ignored. And since you tend to generate steam and sludge when you’re in the bathroom, air vents can get clogged and moldy quite fast.
To clean them, get a step ladder and climb up to their location while bringing a spray of detergent cleaner along with a screwdriver.
Then just follow the following steps:
- Remove the vent with the use of screw driver.
- With a paper towel and the detergent cleaner, wipe the inside down of the air vents.
- Get down and spare a couple of minutes to clean the vent cover with a clean slightly damped cloth.
- And lastly, put it back.
5.) Cleaning the Wastebasket
Is it a garbage can, trash can, or wastebasket? Regardless of what they’re called, most of us know that they tend to smell so cleaning them is a must!
So how do you clean a wastebasket?
Here’s how:
- Begin by taking out the garbage so that the wastebasket is empty before cleaning.
- Upon emptying it, spray an all-purpose cleaner on the outside surface of the wastebasket. When it comes to the all-purpose cleaner, we highly suggest to use a homemade one that consists of plenty of warm water and 1 tablespoon of dish soap.
- Then do the inside of the wastebasket with the same all-purpose cleaner. Make sure that each spot of the interior of the wastebasket is completely soaked. In particular, concentrate on any spots that have seemingly hard-to-get stains.
- After cleaning the interior and outside surface of the wastebasket, it’s now time for deodorizing it. What you want to do is get a ½ cup of baking soda and spread it over into the wastebasket. Make sure to coat the entire wastebasket completely. Leave this process for approximately 5-10 minutes for extra effectiveness.
- While the inside of the wastebasket is soaked, get a dry clean cloth and wipe down the outside of the wastebasket.
- After allowing the inside to soak, get a reliable sponge and scrub the interior of the wastebasket from top to bottom thoroughly. While doing this, you can also scrub the lid of your garbage can. Make sure to completely get rid of the persisting stains. Rinse the sponge as necessary.
- After scrubbing every spot of the wastebasket, rinse it completely.
- And lastly, dry the wastebasket with a clean absorbent cloth.
6.) Cleaning and Disinfecting the Toilet
Though the toilet seems a little gross to clean, you shouldn’t wait until it gets a nasty ring of dirt around the bowl.
Even though cleaning the toilet is not really complicated, there are instances where you’ll get it wrong. So to preclude that, the right cleaning methods won’t only provide impressive results but will also saves energy and time.
That said, let’s start with the supplies:
- Dry-clean cloths or paper towels
- Spray cleaner
- Liquid toilet cleaner
- Goggles
- Toilet brush
- Disposable rubber gloves
And here are the cleaning Instructions:
1.) First, get rid of stuff around your toilet to make things organized. You see, cleaning a toilet is somewhat a messy task, and there’s always the probability of splashing toilet water or cleaner outside the bowl.
Removing everything from around the bowl will preclude unnecessary cleanup.
2.) The next thing you should do is flush the toilet while its lid is down. You do this to preclude splashing. After flushing, put your chosen cleaner to the bowl.
It’s a good idea to apply the toilet cleaner close to the bowl rim to preclude the cleaner from getting diluted.
3.) The third step is to clean the exterior of the toilet bowl while you’re allowing the interior of the bowl to soak with the cleaning solution. Obviously, you must start from the top to the bottom in order to preclude dirtying on the already cleaned surfaces.
Spray the handle, edges, and the tank with the cleaning agent and wipe them down. Then clean the outside lid of the toilet bowl.
4.) As for the fourth step, clean the toilet seat. This part of the bowl must never be overlooked since it’s the part that comes into actual contact with the user, so you should really clean it thoroughly.
To clean it, simply raise the seat, spray the rim, the seat, and the inside lid with the cleaner. You can use a disposable clean dry cloth as necessary.
5.) In this step, you’re now going to clean the inside of the toilet bowl. Again, start cleaning from top to bottom. Start scrubbing under the toilet’s rim.
Then the interior, and lastly scrub the drain hole opening found at the bottom of the bowl.
6.) For the last part, clean up drips of water or cleanser that presented, collect the trash and tools, and put back the items you removed around or on the toilet.
7.) Cleaning Out the Drawers
You should execute this task after your bathroom is all cleaned and organized. Again, remember that it’s not good to do the floors first because certain debris and dirt would most likely end up when cleaning out the drawers.
The main takeaway here is that when you keep your stuff organized, you’ll end up cleaning the drawers just once and therefore less-hassle. Also, if you’re looking to make things more convenient and accessible then acquiring an expandable drawer organizer.
8.) Polishing the Mirror
If you’re getting annoyed gazing to your bathroom mirror because of streaky reflection of yourself, then you should really considering polishing your mirror. This task is actually simple. We have 3 options here, and pick whatever you prefer:
- First is to combine 1 gallon of warm water to 1/3 cup of clear ammonia. Apply the mixture to a sponge or transfer the cleaning solution into a spray container. Simply spray it to the mirror.
Polish the mirror even more with a paper towel, chamois, or a lint-free cloth. Now if you don’t have any ammonia, vinegar is a good alternative.
- Get vinegar and pour it into a pan or a bowl, crumple a piece of paper, immerse it in the vinegar, and apply it to the mirror. Wipe the mirror a few times with the same paper until the glass is close to drying. Finally, polish it using a clean newspaper, or soft cloth.
- Combine 2 cups water, 2 tablespoons of liquid dishwashing detergent, and 2 cups of 70% isopropyl rubbing alcohol. Mix the elements until thoroughly blended, and then transfer the solution into a spray bottle.
Just spray directly on your mirror. Use a dry paper towel, chamois, or a lint-free cloth as the finishing.
9.) Cleaning the Shower and the Tub
Most likely, the first and normally the hardest spot to deal is the shower or bathtub. Grout and tile can immediately become a daunting task when left unattended for more than a couple of days. If you are dealing with plenty of tough water stains, damaged grout, or mold then you can try some proven tips found here.
In addition, you can also follow these steps to keep your shower and tub clean:
- Make a homemade bathroom cleaner. It’s not really important to purchase pricey and potentially harmful chemical cleaners for your lavatory. In fact, you can use an empty spray bottle to mix two drops of dawn dish detergent, a few drops of lemon essential oil, a quarter cup of vinegar, and just fill with water.
Use this solution for heavier cleaning chore with a sponge once or two per week. You can also use it for your shower daily.
- Wipe down the tub with a spray. After each shower, spray and wipe down your tub or glass to keep water stains from accumulating up in the first place.
- Add a little bit of baking soda. For water spots and light mildew, a bit of baking soda might be necessary. Amalgamate a thin paste in a clean bowl and use a soft-bristle brush to thoroughly scrub the toughest places.
- Rinse and repeat. The key on keeping your lavatory in ideal shape is to spray and wipe it down consistently. Keep mildew and mold at bay by simply spraying your shower with your bathroom homemade solution at the end of your shower, then just wipe it down every other day.
- Once you begin cleaning your shower consistently, you might want to consider trading in your bar soap for a liquid alternative. See, the residue from a bar soap is a little bit hard to clean, and will probably just accumulate in your shower.
Conclusion

Well, that sums up our checklist. Always keep in mind that bathrooms are probably the most important space in everyone’s household. They have many purposes, and these purposes are certainly essential in order to leave conveniently and in peace.
Just imagine a house where there’s not even a bowl for your waste. Do you think you’d be able to live happily and comfortably? Most likely not!
So again, make sure to know how to clean a bathroom by following the checklist we’ve discussed above.They will surely give you the advantage and convenience you’ll be grateful for in the long run.
Now, do you have a great tip that we can add to our bathroom cleaning checklist? If so, please let us know in the comments down below and we’ll surely get back to you as soon as possible.
For more amazing ideas you can have, visit Guy About Home today or you can check the related blogs:
- How To Clean Bathroom Tiles And Grout
- Cleaning Concrete Patio: What You Need to Know First
- How to Clean and Disinfect Your House
- How to Thoroughly Clean your Bathroom
- Cleaning Stove Tops and Everything In between
- 14 Kitchen Cleaning Tips for Effective Cleaning
- How To Clean The Kitchen Sink
- How To Clean Your Room – Routines and Techniques
- How To Clean Living Room Carpets & Rugs