
Knowing how to wall mount a TV may just be one of the best cable management techniques there is. Although that wouldn’t be its primary purpose, it sure helps the over-all aesthetic of your home. Wall mounting a TV, when done properly at least, keeps that section of the room looking neat and tidy.
Thank you for reading this post, don't forget to the best blogger Guy About Home who offers the best garden and home improvement tips! If you are a home decor and design fan, don't miss the tips on home ideas. If you are a home garden owner, then you might be interest in our complete guides to house plants!

Also, if you’re going for a futuristic house, this idea absolutely helps with that theme. However, it isn’t uncommon for people to think that this is an endeavor best left for the professionals. This is because the task seems intimidating and daunting. Plus, mistakes could possibly get costly.
Here’s how to do it properly!
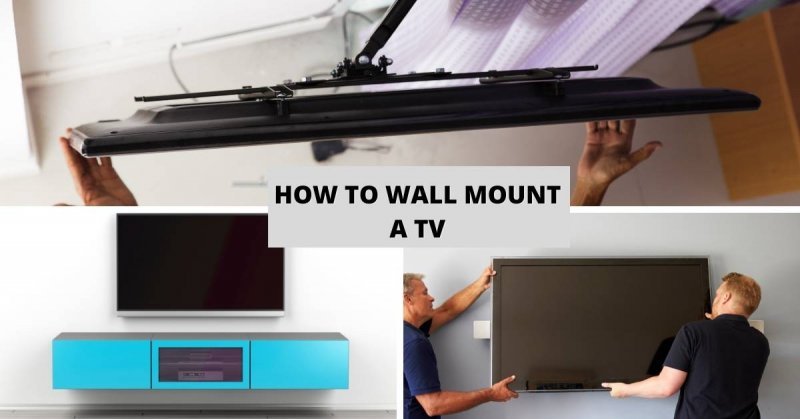
How To Wall Mount A TV
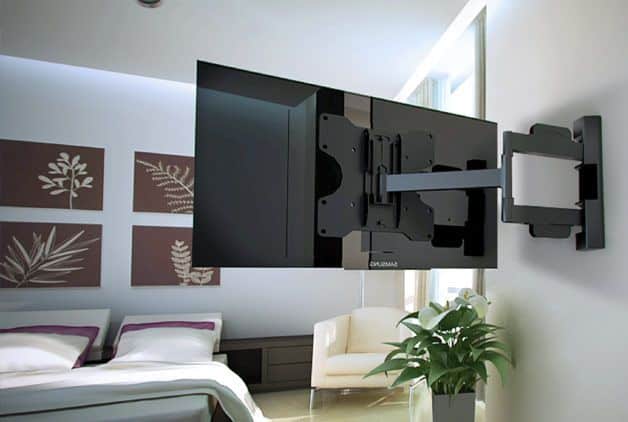
Image Source: Pinterest
A quick guide
From this point forward, we’ll be assuming that you aren’t going to be mounting a CRT monitor. Rather, this guide would be for those looking to mount flat screens, OLED displays, QLED, and the rest.
We get it, wall mounting a TV can be intimidating. So much so that most people would only dream about wall mounting their TV, but not actually go through with it. We’re here to say that that does not have to be the case!
Check the TV to be mounted
Let us first break the assumption. Not all flat screen TVs and monitors are made to be wall mounted. To avoid any waste of time and effort, please check first if the product you have has the bracket and screw entryways at its back.
You can check the manual, the product descriptions, you can ask the manufacturers or sellers themselves, or even just look at the back of the item. If it seems like there is a place where a bracket can be screwed in, then it probably can be wall mounted.
Acquire the appropriate wall mount bracket
Image Source: Pinterest
For most products, this is not a one size fits all scenario.
- First, check the weight of the TV. It can either be in the box or manual. This is vital because there is a limit to how much weight a certain product can carry.
- Next, check the weight limit your wall bracket can carry. If your monitor falls within the acceptable load it can withstand, then that will be your go signal! It goes without saying, but don’t risk it. Saving a few dollars isn’t worth risking your $5,000 screen!
There are different kinds of mounts, although they would most likely use the standard VESA (Video Electronics Standards Association) mount. Some mounts can tilt, which means that you can mount your TV higher up and you would still have a great viewing angle. There also those that swivel, these ones provide more than one viewing angles for when you’d like to switch positions or rearrange the furniture in the room.
Plan its location and where it will draw power from
For this part, knowing how to hide wires might be advantageous to you.
Before just going ham with the project, take a step back for a second. Try to pan around the room and imagine the places that are viable for a wall mounted TV. List them down in a checklist and go through them one by one. After which, pick your favorite spot. Then, ask yourself these questions:
- Will you be sitting in just a chair, recliner, or a big sofa?
- Will that then have ample space for you in front of the TV?
- Is there a power socket nearby?
- If not, what will you do now? Will you install extension cords as well?
- Is this the best possible spot functionality-wise?
- Is this the best possible spot aesthetic-wise?
Once you have completely gone through this list, you would most likely now have a great idea as to how the end-product will look like.
Measure the designated part of the wall
Pro tip: if you’re going to be running an HDMI Ethernet and Optical cable through the wall, ascertain that they are CL3 rated. This can be seen on the cables itself.
Also, plan ahead. Because even if you aren’t going to be using HDMI cables now, chances are you will be in the future. Especially when you’ll be adding new components. This is already the best time to install the cables. If you’re going to be having a lot of wires, a separate compartment for cables would be a great cable management tip.
Tools you’ll be needing:
- Socket Wrench
- Drywall Saw (Handheld or electronic)
- Pencil
- Philip Screwdriver
- Drill (with the necessary drill bits)
- Level
- Stud Finder (preferably electronic)
- Tape Measure
Step 1:
Set the height of the TV. It’s best to put it on a 42” distance from the floor and the center of the screen. This puts you generally at eye level. Use the tape measure to find that measure and a pencil to mark it.
Step 2:
Break out the stud finder and find the studs on the wall near where the TV is aligned.
Step 3:
With your package, there should be a provided template about mounting, but it’s better to use the bracket themselves in combination with the level as a template. This is more accurate when measuring the wall. Mark with your pencil where the pilot holes should be drilled.
Step 4:
After drilling the holes, with or without drywall anchors, mount the “receiving” bracket.
Step 5:
After you’ve installed the receiving bracket, all that is left to do is to secure the screws in the hook bracket (the one attached to the back of your TV). Make sure they are screwed in to its best. Ask a friend or housemate to help you lift the TV up and mount it on the bracket.
Congratulations!
Mounting a TV is a worthwhile endeavour. It keeps a sleek aesthetic, and the cable management is a top-notch solution. Enjoy all the shows you like watching at the best possible angle. Whether it be news, sports, theatre, science fiction, drama, or Netflix, a wall-mounted flat screen indeed provides a fantastic viewing experience.
Your wall-mount is most likely reliant if you didn’t cheap out on the materials. Thus, you wouldn’t have to worry too much if there is an earthquake. Assuming of course that it isn’t too strong and your location isn’t the epicenter.
For more amazing ideas you can have, visit Guy About Home today or you can check the related blogs: