
As far as garden quotes go, it has been said that the best potatoes to grow is the one you started growing.

Potatoes are one of the most nutrient-rich vegetables available for consumption and are a favourite side dish and can be cooked very quickly by boiling, frying and baking.
Thank you for reading this post, don't forget to the best blogger Guy About Home who offers the best garden and home improvement tips! If you are a home decor and design fan, don't miss the tips on home ideas. If you are a home garden owner, then you might be interest in our complete guides to house plants!
A medium-sized potato has no cholesterol, zero fat or sodium, and has more potassium than a banana. So your idea of growing potatoes at home will surely be a great benefit to you and your family.
Farmers and gardeners alike will attest that growing potatoes at home is one of the most straightforward gardening projects that you can accomplish. It only takes about ten weeks to plant and harvest full-grown potatoes.
How to grow potatoes
Step 1 Choose quality seed potatoes

Image Source: Pinterest
Potatoes don’t grow from seeds like most plants do. They are actually grown from other potatoes which are technically called seed potatoes. Seed potatoes are organically grown, free from any chemicals which cause them to sprout.
The best way to grow potatoes at home is to start with quality seed potatoes. While it is possible that the potatoes in your local grocery store have not been sprayed with seed inhibitor, the odds are they have been and will be useless for planting.
Commercial potatoes are sprayed with seed inhibitor after harvest to prolong shelf life and to prevent “eyes,” seeds or sprouts from forming on the skin of the potato.
Supermarkets don’t want potatoes with many sprouts being sold in their store because they are deemed unsightly by consumers which affect sales.
If you’re wondering how to grow potatoes, then I recommend only using certified seed potatoes to start growing potatoes problem free. Certified seed potatoes have been checked to make sure that they are disease free and ready to start sprouting.
Once you have acquired your certified seed potatoes, store them in a lit, warm area for about two weeks. This will allow the seed potato to generate more sprouts or eyes. Doing this will enable you to cut the seed potato later on to maximize your harvest.
Step 2 Prepare your soil
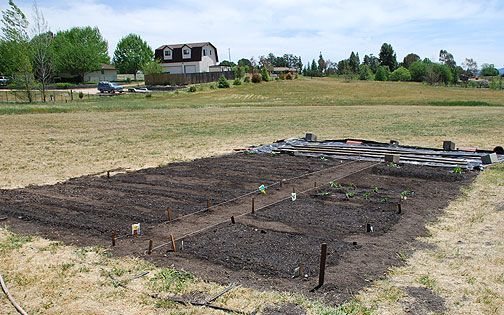
Image Source: Pinterest
While waiting for your seed potatoes to generate more sprouts, it is now time to get your land ready. You can choose to use the earth in your garden, create a planter box on your patio or use old-fashioned containers to plant your potatoes. What is essential is you prepare the soil.
There is nothing worse than trying to grow potatoes in soil that has not been prepared for the task. It will be a big waste of resources and all the effort you will be made pointless. It is of utmost importance to till the land before you start planting potatoes.
Potatoes cannot grow in soil that is compact. The land in your planter box or garden needs to be very loose for Potatoes to develop correctly. Having good drainage is another must for your soil. Compact soil will retain too much moisture which will cause your potatoes to rot.
To make sure that your soil is in optimum condition for growing potatoes it is best to mix your soil with azomite for added trace minerals to feed your plants. Azomite is refined from volcanic rock which is known to be extremely fertile.
Azomite is an organic fertilizer that provides your soil with over seventy different kinds of trace minerals. These minerals will then be absorbed into the land which would translate to more nutrients and minerals to feed your growing plants.
Azomite is a favorite soil amendment among organic gardeners and can be used to help you grow anything you want in your garden better.
Expanded shale is another fantastic soil amendment to help lossen compact soil. Mixing expanded shale in your soil will greatly improve soil aeration and drainage. It is a worthwhile investment for long-term gardening projects and will improve the overall quality of your soil.
Make sure you thoroughly mix in all the soil amendments. Prepare your garden by making rows of mounds wherein you will plant your potato seed.
Step 3 Prepare your Potato seed
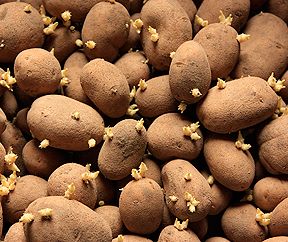
Image Source: Pinterest
Once your potato seeds have grown enough sprouts, you can then proceed with cutting them. Sure you can plant a whole potato seed in the ground, but that would only give you one plant. It is best to split one potato seed into four equal parts.
First, cut it in half then cut the half in two equal parts, a quarter of a whole potato seed is enough to plant on its own. So one potato seed can generate four potato plants if done in this way. Make sure that each cut has at least two eyes or sprouts.
As you cut the potato seeds into quarts, dip the cut sides in powdered sulfur fertilizer. Sulfur is an organic fertilizer which will ensure that the cut portions will not rot and will provide added nutrients for the seed potato to grow.
Do this step for all your potato seeds to quadruple your supply. Allow about a day or two for the sulfur to crust on the newly cut potato seeds. Sulfur fertilizer is an insecticide, fungicide and an acid fertilizer all in one. Potatoes need slightly acidic soil to grow properly; sulfur helps with that.
Step 4 Planting the seed
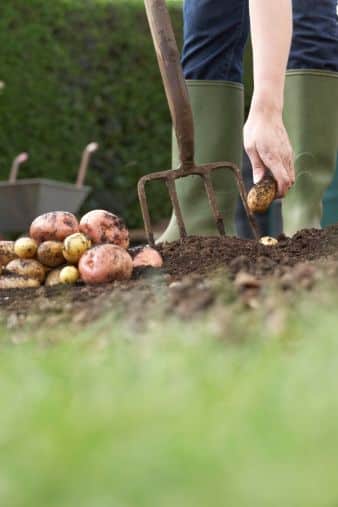
Image Source: Pinterest
Potatoes are unique because you are planting potatoes from potatoes. Dig holes about four to six inches deep and insert one cut potato seed into the hole.
It is essential to put the seed potato cut portion down to the soil, and the sprouts need to be pointing up. Cover it loosely and continue planting a new seed every eight to twelve inches apart.
It is essential to water your plants when they get dry. Do not overwater the plants; you do not need to have soggy soil for potatoes to grow. Overwatering maybe be detrimental to your potatoes development so be careful in that regard. Too much water can cause you crop to rot.
Nourishing your growing plants is essential. Use rock phosphate to feed your plants and promote root growth.
When the plants have grown to about eight inches, make sure to cover half of the plant with more soil, make the mound taller. It is crucial to protect you potatoes from the sun otherwise your potatoes will turn green and will become inedible.
Step 5 Harvest
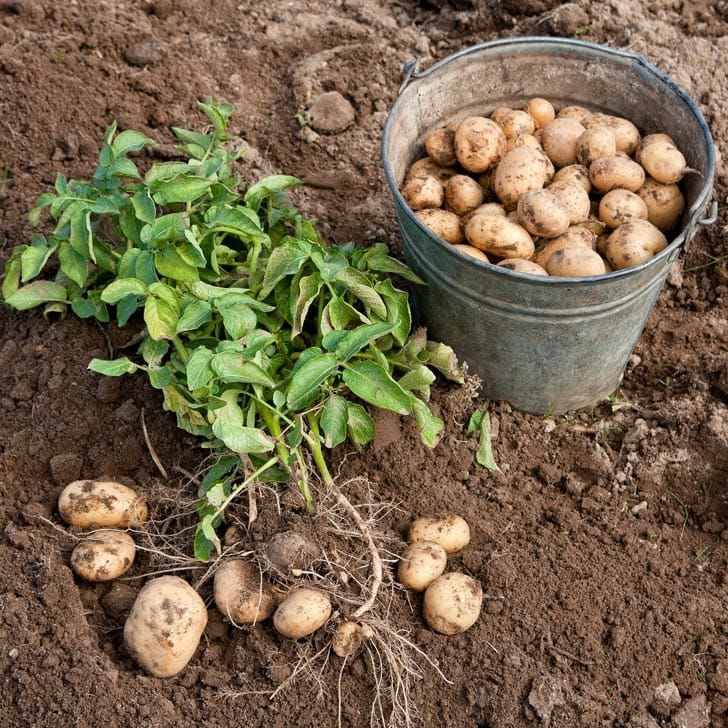
Image Source: Pinterest
Once you observe your potato plants have finished flowering, then that would indicate your new potatoes are ready for harvest. However, if you harvest at this time, you will only get baby potatoes.
In case you want to harvest larger potatoes then you will need to wait two to three weeks after the flowers have already died. This will allow you to reap substantial mature potatoes.
Make sure to have a significant basket when harvesting. During harvesting start digging about a foot from the mound and carefully lift up the plants. Grab the potatoes and pick them off from the plant.
Conclusion:
Growing potatoes at home is a worthwhile project that will keep your family fed with quality organic vegetables. Plan to grow and harvest your potatoes one month before your frost date, so it depends on where you live as to how often you can grow potatoes.
However often that will be for you, try your best to squeeze in some potato planting time to reap the awesome rewards. Do the steps above, and you can reap a harvest that can keep your family stocked with potatoes for a long time.