
Thank you for reading this post, don't forget to the best blogger Guy About Home who offers the best garden and home improvement tips! If you are a home decor and design fan, don't miss the tips on home ideas. If you are a home garden owner, then you might be interest in our complete guides to house plants!
Isn’t it great to learn a new skill or trick? I mean, sure, you can buy everything you need off of some shelf at the store, but doesn’t learning something new excite you? Further to that point, what if learning that new skill, in turn, saves you a pretty penny? Now it’s sounding better, eh?

There are also leather sofas, so it would be beneficial for you to know how to clean sofa.
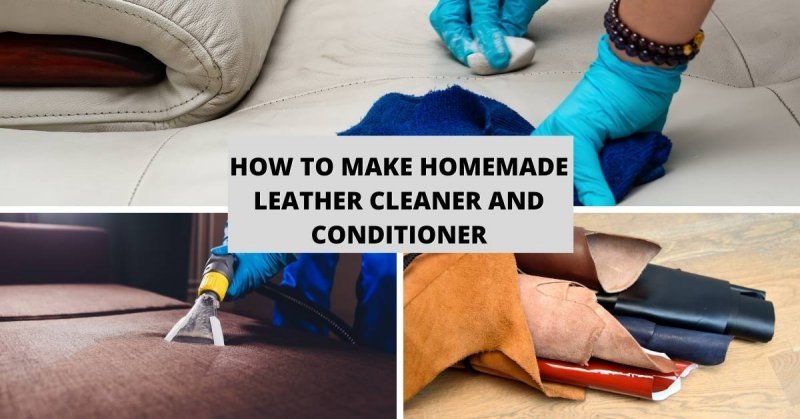
Well, you’ve come to the right place. Here’s an article the completely outlines how to make homemade leather cleaner and conditioner!
How to make the leather cleaner

The Materials Needed
If you have a lot of leather couches, leather couch care should be your priority. After all, the couch does have the ability to either make you feel like a king or a slob. This applies to apparel as well, so clean them periodically! Also, don’t you lie there when your spouse kicks you out of your bed for being drunk and stinky? Point made!
Now, let’s start that by gathering everything we’ll be needing for this task.
- Olive Oil
- Regular vinegar
- Spray bottle
- Any soft rag or a microfiber cloth
- Vacuum (optional)
Step 1:
Begin by sterilizing the item.
Grab the vacuum and run it all over. You may also use a towel, a rag, or even just some piece of cloth. Whatever material that doesn’t damage the leather. Just get the dust, mud, Cheetos, bread crumbs, and God-knows-what-else is hiding there, out of your couch/jacket/shoe.
Step 2:
It’s now time to synthesize the olive oil and vinegar.
Acquire a mixing apparatus and mix them well. You can use a small bowl or a glass/cup with a cover. We recommend the simplest way possible, but, should you also choose to use apparatuses like a Florence flask, crucible, or even an Erlenmeyer flask, we’ll support that too! Sure, whatever floats your boat! Shake, stir, or salsa with them as needed.
Use only about a quarter-cup of the olive oil, and a half cup of the vinegar.
Do note, however, that the two won’t wholly mix as they have different densities. What cleans the leather is the vinegar, while the stains, grime, filth, and dirt and taken care of by the olive oil. This effectively conditions the furniture.
Pour the solution into the spray bottle.
Step 3:
Test run!
Before going crazy with the formula, let’s test it on a small patch somewhere (preferably hidden or hard to see) on the item.
To experiment, break out the spray bottle and apply some at the inconspicuous patch. Let your work dry for about fifteen to twenty minutes. What we’re looking for is any potential discoloration or damage on the area. By now you must have realized that you shouldn’t work on this step with your most expensive leather jacket. If there’s none, good! We can proceed.
Cover the whole area by rubbing the cleaner into the leather. Execute this step diligently; spraying for about a square foot at a time and by wiping in a circular motion just like how you saw in Karate Kid, wax on – wax off, but with your fingers instead! Also, shake the bottle every once and awhile. This should help you get a good spray, rather than a stream, of the solution!
Next, let’s remove the remaining oil by wiping it off with a dry paper towel or cloth. Execute this step gently. No need to overexert.
And you are done!
Two things to note, however:
- If you dislike the smell of the vinegar, you may add eucalyptus oil or your preferred essential oil to the mix. Although, the vinegar’s scent does not really stick for long.
- Also, use this only on the intended subject; leather. This may cause abrasions or damages to materials such as suede.
Pros:
- Extremely inexpensive solution
- Very easy to find materials
- Surprisingly astounding results
- Helps you find lots of pennies (under the couch!)
Cons:
- Does not clean off pen marks
- Does not fix leather couch tears, scratches, or rips
- Does not help with peeling
- Does not help you find the remote (under the couch, probably!)
How to make the leather conditioner

Since leather bags, shoes, jackets, and especially furniture is not always the most inexpensive items on the market, you’d, of course, want to preserve them for as long as possible. Unless, of course, you’re fine with constantly buying and replacing. That’s up to you. Just keep in mind that wear-and-tear applies heavily to furniture.
If you’re in a hurry and don’t actually mind the higher cost, we recommend grabbing a leather conditioner off a shelf at the store. Same goes for the homemade leather cleaner, too. They will always be the best solution since they have been tried, tested, and proven a hundred times over. But should you ever want to partake in a cost-saving adventure, read along for the ride.
To make a great homemade leather conditioner, you will need the following:
- Measuring cup and spoon
- A tin or heat-resistant plastic
- Saucepan
- Beeswax
- Almond oil
- Castor Oil
- Shea or coconut butter
- For those with a nut allergy, you may substitute this with grapeseed oil
Step 1:
Using the measuring cup or spoon, heed this ratio when measuring the butter, beeswax, and oil respectively: ½-½ -2.
Step 2:
Break out the saucepan and melt the beeswax and butter over low to medium heat. This step should be executed while stirring continuously. This is done to avoid boiling.
Step 3:
While still stirring, pour in the almond oil.
Step 4:
Pour in the castor oil, but only when you’ve observed that the almond-oil has mixed in thoroughly.
Step 5:
Keep stirring, blending, and heating for about 3:30-5:00 minutes. Just make sure that it doesn’t boil
Step 6:
Grab the tin or heat-resistant plastic and pour the solution inside. You may allow it to cool now.
For formula adjustment:
- More beeswax = firmer
- More oil = softer
Your own cost-saving, DIY leather cleaner and conditioner
You may adjust the solution with the formula in mind. That is fully dependent on you and your preference. As with the cleaner (and with any DIY solution, for that matter), also conduct a test run in an inconspicuous spot. This will tell you to proceed or not with the solution you’ve made.
For more amazing ideas you can have, visit Guy About Home today or you can check the related blogs:


Thank you! I’ve been using plain grapeseed oil. I’ll add the other items to the mix now. I really enjoy your writing style.
Thank you! I’ve been using plain grapeseed oil. I’ll add the other items to the mix now. I really enjoy your writing style.