Most of us are familiar with bin composting. This is the process where we dump our “greens” such as vegetable scraps, fruits scraps, coffee grounds, eggshells, which are rich in nitrogen into a compost bin. Store it until its full then throw them into a compost pile.
Thank you for reading this post, don't forget to the best blogger Guy About Home who offers the best garden and home improvement tips! If you are a home decor and design fan, don't miss the tips on home ideas. If you are a home garden owner, then you might be interest in our complete guides to house plants!

Then you add a layer of carbon sources like dried leaves, shredded newspapers, cardboard, also known as browns, mix these materials together and just wait for them to compost.
You always need to add a layer of browns whenever you add the greens and give it a good stir. Other than that you would need to make sure to stir the pile every two weeks as well. This is the more traditional method of composting which does not involve any worms but is more labour intensive.
However, vermiculture is a revolutionary trend that is gaining popularity in today’s green communities. Because of its low maintenance and high productivity in creating compost out of your food scraps, more and more people are deciding to own a vermicomposting bin.
Vermicomposting is similar to traditional composting in the sense that you will need to dump your food scraps into a bin. Although you will not need to mix any extra materials in anymore. It is composting without the need for human intervention to mix the compost pile everytime you add ingredients.
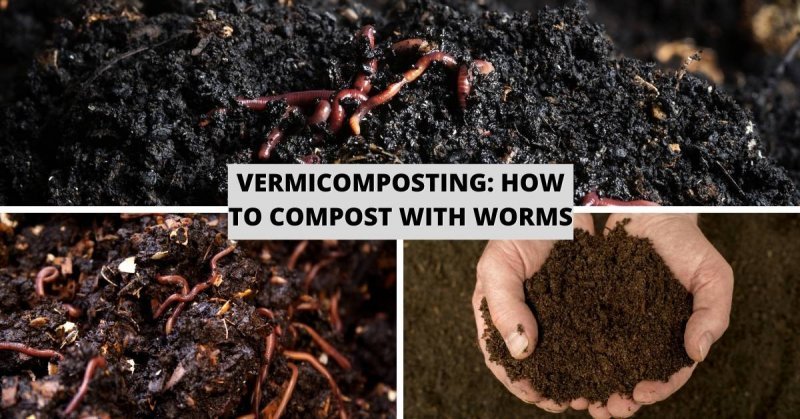
The compost is called vermicast or worm castings, the red wigglers eat your food scraps through one end and once digested, worm castings or vermicast goes out the other end. That is mostly how vermicomposting works.
If you don’t mind the idea of growing a thousand or so worms in a separate bin to digest and decompose your food scraps and turn them into compost also called vermicast or worm castings then vermicomposting may be for you.
Not just any worms will do when starting a worm bin. You will need to find a specific type of red worms or red wigglers; their scientific name is Eisenia fetida. You can buy them online from Amazon and have it shipped to your door.
There are red worm packages that come with twelve hundred worms, perfect for a starter vermicompost bin. Instead of using a plastic container and creating a homemade worm bin, I highly advise you to buy a proper multilayer vermicompost bin also available through Amazon.
Regular homemade worm bins are okay too, but it is a bit of a hassle when it comes time to harvest the compost comprised of vermicast or worm castings. You would need to dump everything onto a plastic tarp and sift through everything manually.
The multilayer vermicompost bins are designed to avoid that type of inconvenience when harvesting your compost. It is also optimally designed to be user-friendly with efficient but straightforward functions.
There are in-depth instructional videos, manuals that will come with your purchase of the vermicompost bin which will show you how to get started vermicomposting easily and how to use its many features as well.
The result of the vermicomposting process is a compost which is rich in nutrients and is often used as a fertiliser or soil conditioner. You can also use this compost to make your compost tea, otherwise called worm tea which will douse your plants with concentrated nutrients.
In case you don’t like the idea of growing a thousand or more worms inside your home then you can just stick to the more traditional method of composting.
How to compost with worms
Step 1 Prepare a Worm Bin
Invest in a proper vermicompost bin. If you have decided that this is the direction you want to go
to be more environmentally friendly. Start vermicomposting in earnest and yes buy the multilayer vermicomposting bin. It will make your journey towards going green that much easier.
The beautiful thing about buying a manufactured vermicompost bin is that you won’t have to mess with creating a worm bin yourself. It’s already factory made for you, all you need to do read the manual watch the instructional videos and just start using it.
If you do not feel like spending any money on a vermicompost worm bin, then you can still use an old plastic tote box, wooden box or even an old aquarium. Any large container will do. Wood is good because it will be able to absorb any moisture but it runs the risk of getting rotten over time.
Plastic containers would be ideal for their durability, and yes glass will work nicely which even has the bonus of you being able to watch your worms at work through the looking glass. Make sure all the corners are airtight and that you would have a cover that can fit loosely at the top.
Once you have a container picked out, you will need to drill some holes in the container for drainage. Add some holes on the top sides of the bin as well for air circulation. Set your tub on a plastic tray to act as a catch bin for any drippings.
Step 2 Prepare the bedding
Once you have a container ready, then it is time to add a layer of bedding to the bottom part of the bin. Add a generous amount of bedding, about half the size of your container would do nicely.
The bedding is essential because this is the medium where your worms move around in. They need this to move from point A to point B and get to your food scraps freely.
Examples of Bedding
- Shredded Newspaper
- Peat Moss
- Wood shavings (untreated wood)
- Shredded leaves
- Finely Shredded Cardboard
- Shredded Computer paper
- A mix of the above
Step 3 Prepare the worms
The question here would be “How many worms do would you need?”. For this, you will need to measure all your food scraps for one week.
Take all the compostable materials that you usually throw away, compile them in a container every single day. At the end of the week weigh how heavy your food scraps totalled to for one whole week. Red worms are known to be able to eat more than their body weight.
Here is a rough estimate as to how much worms you need per ounce of food scraps. If you generate about five ounces of food scraps per day, you would need around five to ten ounces of worms to consume and convert your food scraps into compost.
If you don’t have enough worms to consume all your food scraps yet, then don’t worry. Just feed them less and your worms will multiply rapidly.
Worms are asexual creatures so, and they can mate with each other. 1 worm can lay about three to five eggs. It will take eleven weeks for worm cocoons to hatch. Worms can double their population in sixty days.
Conclusion:
About one-third of the food that we eat per day ends up as waste. This goes to landfills and emits greenhouse gases that harm our planet. When you decide to compost at home, you will be reducing your trash by about eighty percent.
You will be giving back to assist in protecting the environment. Also, you will produce valuable compost at home to help you grow your food naturally.
If you are an entrepreneur, you can even start a worm farm and produce worms. Which you can sell at a premium and help future vermicompost enthusiasts. Doing so will help spread vermiculture and save our planet.